
Bee boxes plans
 If your package doesn't have pre-drilled holes it would be safer to drill a hole where the nail is going before continuing further. Although it’s not required, performing this will avoid the nail from being misaligned whenever hammering the box collectively.
5. Dry fit all of the pieces together which will make a box. Be sure they can fit together tightly and also the manages take the exterior for the box.
6. Today apply one clamp for each region of the hive box toward the top. This can hold the package in position for nailing. Although you could nail the box collectively without clamps, I would personally not recommend it. The clamps permit you to nail the container together easier by keeping the pieces in position while you nail all of them. With no clamps, the force you put on the nail whenever you drive it to the framework can cause one other unsecured bones to fall aside.
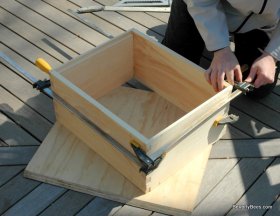
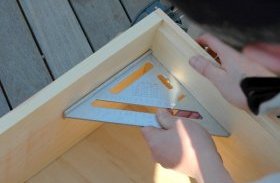
7. While acquiring the four clamps, verify that the box is square making use of the carpenter’s square. Adjust the clamps and box as required to have it into alignment.
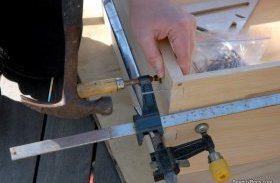
8. You can now start nailing the box collectively. Pick a top spot and hammer within one nail.
9. Nail an additional nail to the exact same part regarding the field from the adjacent part. Check if the container is square while you complement. You don’t want to examine after each nail but check frequently to keep the container aligned. It really is a lot easier to modify the container as you complement than need to pull nails and begin over.
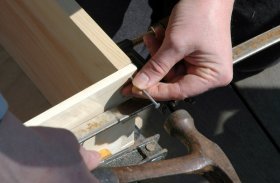
10. Move to next part and hammer within one nail and a mix nail in the adjacent side. Consistently nail the residual two sides in the same fashion. You need to have 8 fingernails within the box whenever you are done.

11. Get rid of the four clamps and flip the box upside down. Put the four clamps right back regarding package toward the most effective. Search for squareness in most corners, modifying the box and clamps when necessary.
12. Start in one corner and hammer in one nail and adjacent cross nail. Work the right path all over box until all sides are nailed.
13. You ought to have 16 fingernails when you look at the field whenever you are done. Check if the container is square, adjusting and muscling into location if necessary.
14. Now you can put the staying nails in to the box. Start with one side and work your path across the field.
15. After all 40 fingernails are hammered to the finger joints you've got a completed hive box. Congratulations! Today it's time and energy to begin again and work out another.
If you're making numerous hive cardboard boxes it will be easier to use a jig to put together all of them, but also for the backyard beekeeper this is certainly an easy and easy way to place a few hive cardboard boxes collectively.

Share this article
Related Posts

Latest Posts


